How to Integrate Crypto Payments in Your Website
Adding cryptocurrency payments to your website is a great way to attract tech-savvy customers and unlock new revenue opportunities. This guide will show you simple and effective ways to start accepting crypto payments, whether through third-party providers or custom solutions. If you have a WordPress website, we’ll also walk you through the steps to set up crypto payments easily.
Jump direct
What are Crypto Payments?
Before diving into implementation, it's crucial to understand the basics:
- Cryptocurrency Wallets: Digital wallets that store your crypto
- Payment Addresses: Unique identifiers for receiving payments
- Transaction Confirmation: The process of verifying payments on the blockchain
- Gas Fees: Transaction costs on the blockchain
How Crypto Payment Flow Operates

When a customer makes a crypto payment to your website, the transaction goes through several stages.
First, the payment is initiated when they send crypto from their wallet to your provided address. The transaction then gets verified on the blockchain through a process called mining or validation. Once confirmed, the payment will appear in your crypto wallet or payment gateway dashboard.
For example, if someone pays you 1 ETH, you'll see this transaction appear in your Ethereum wallet along with details like the sender's address, amount, and transaction hash. Most payment gateways will also send you email notifications when you receive payments.
How to Manage Crypto Payments
Where Payments Appear
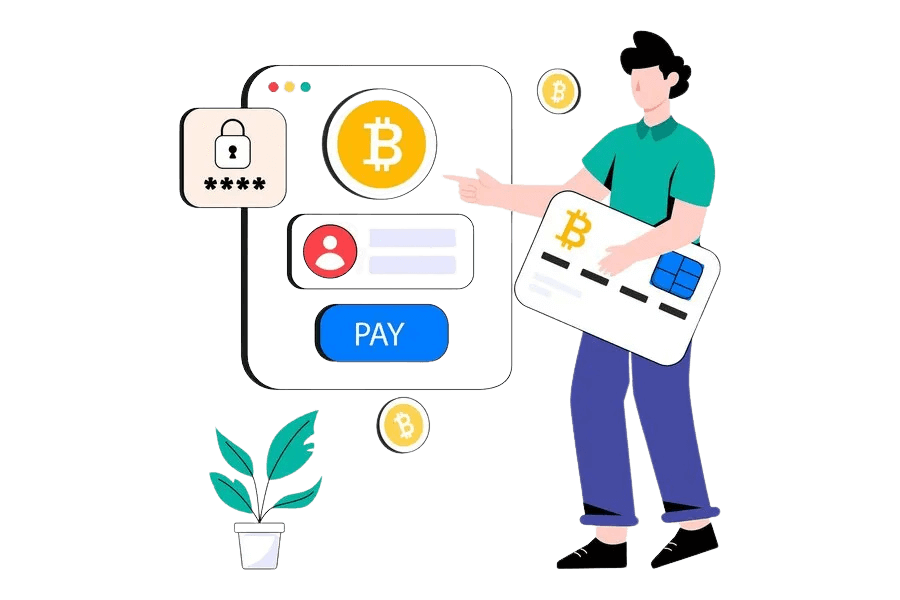
Your received crypto payments will show up in different places depending on how you've set up your integration:
If you're using a payment gateway like Coinbase Commerce or BitPay, all payments will appear in your dashboard on their website. These platforms provide detailed transaction histories, including payment amounts, dates, and order IDs. They usually offer both web interfaces and mobile apps for managing your payments.
For direct blockchain integration, payments will appear in your cryptocurrency wallet. You can use wallets like MetaMask for Ethereum-based payments or Trust Wallet for multiple cryptocurrencies. These wallets show your balance and transaction history in real-time.
How to Withdraw Funds
Withdrawing your received crypto payments can be done in several ways:
- Through Payment Gateways: Most payment gateways like Coinbase Commerce allow you to automatically convert crypto to fiat currency (like USD or EUR) and withdraw to your bank account. This is the easiest method as they handle all conversion and transfer processes. They usually charge a small fee (around 1%) for this service.
- Direct Wallet Withdrawal: If you're using a direct blockchain integration, you can transfer funds from your business wallet to:
- An exchange wallet (like Binance, Kraken, Kucoin, Gitget and Bybit) to convert to fiat
- Another crypto wallet for storage
- Directly to your bank account through services like Binance P2P
Remember to consider withdrawal fees and timing. Some platforms have minimum withdrawal amounts and processing times vary by method.
How to Choose the Right Blockchain for Low Fees
Currently in 2025, these blockchains offer the lowest transaction fees:
Solana (SOL)
Average transaction fee: $0.00025 Processing time: 400ms-700ms Solana provides extremely fast transactions at very low costs. Perfect for microtransactions and high-volume businesses.
Polygon (MATIC)
Average transaction fee: $0.01-0.05 Processing time: Few seconds The Polygon network is one of the most cost-effective options. It's compatible with Ethereum smart contracts but offers much lower fees. Many payment gateways already support Polygon.
Binance Smart Chain (BSC)
Average transaction fee: $0.20-0.50 Processing time: 3-8 seconds BSC offers a good balance of low fees and wide adoption. Many tools and wallets support BSC transactions.
Tron (TRX)
Average transaction fee: Almost zero Processing time: 3-5 seconds Tron specializes in handling stable coins like USDT with virtually no fees, making it excellent for business transactions.
Popular Payment Gateways to Integrate Crypto Payments
Whichever provider you pick, the integration lives or dies on webhook handling — the callback that tells your site a payment confirmed. If you have not built one before, our walkthrough of setting up and debugging a webhook covers the same failure modes: missed retries, unverified signatures and silent timeouts.
Before Integrate crypto payments SSL is a must for e-commerce websites; without it, payment gateways won’t work. Also, check HSTS headers for added security.
Coinbase Commerce
To Integrate Crypto Payments in Coinbase Commerce, you need to install the @coinbase/commerce-node library in your project. First, initialize the client with your API key, which you can obtain from the Coinbase Commerce dashboard. Use the code snippet below to create a charge, which includes details like product name, description, price, and metadata.
// Example Coinbase Commerce integration
const Commerce = require('@coinbase/commerce-node');
const Client = Commerce.Client;

const client = Client.init('your-api-key');

// Create a charge
const charge = await client.charges.create({
  name: 'Product Name',
  description: 'Product Description',
  pricing_type: 'fixed_price',
  local_price: {
    amount: '100.00',
    currency: 'USD'
  },
  metadata: {
    orderId: '123456'
  }
});
Add this code to your server-side application where you handle payment creation. Replace placeholders with actual values for your product and API key.
BitPay
For BitPay integration, install the bitpay-sdk library and initialize it with your API key. Use the following code to create an invoice. This invoice includes the payment amount, currency, order ID, and optional URLs for notifications and redirections.
// Example BitPay integration
const BitPay = require('bitpay-sdk');

const client = new BitPay({
  apiKey: 'your-api-key',
  environment: 'prod' // or 'test' for sandbox
});

// Create an invoice
const invoice = await client.createInvoice({
  price: 100.00,
  currency: 'USD',
  orderId: '123456',
  notificationURL: 'https://your-website.com/webhook',
  redirectURL: 'https://your-website.com/success'
});
This code should be added to the backend of your application where invoices are created. Ensure that you replace placeholders with actual data.
Direct Integration Methods
Ethereum Integration Example
To accept Ethereum payments directly, use the Web3.js library. The code below demonstrates how to request account access from the user, create a transaction, and send it to the Ethereum network.
// Using Web3.js for Ethereum payments
const Web3 = require('web3');
const web3 = new Web3(Web3.givenProvider);

async function createPayment(amount, recipientAddress) {
  try {
    // Request account access
    const accounts = await ethereum.request({
      method: 'eth_requestAccounts'
    });

    // Create transaction
    const transaction = {
      from: accounts[0],
      to: recipientAddress,
      value: web3.utils.toWei(amount.toString(), 'ether')
    };

    // Send transaction
    const result = await ethereum.request({
      method: 'eth_sendTransaction',
      params: [transaction]
    });

    return result;
  } catch (error) {
    console.error('Error:', error);
    throw error;
  }
}
Include this function in your frontend application to handle Ethereum payments. Replace recipientAddress and amount with dynamic values based on your requirements.
WordPress Integration
If the site runs on WordPress, keeping the install itself healthy matters as much as the payment plugin — see our guide to cleaning up a compromised WordPress site, and what a web application firewall adds once real money moves through it.
Using WooCommerce Crypto Payment Plugins
To Integrate Crypto Payments with WooCommerce, you can use plugins like CryptoPay. The following PHP code shows how to hook into the payment completion process to update the order status.
CryptoPay for WooCommerce
// Example of hooking into CryptoPay
add_action('cryptopay_payment_complete', 'handle_crypto_payment', 10, 2);

function handle_crypto_payment($order_id, $transaction_data) {
    $order = wc_get_order($order_id);

    if ($transaction_data['confirmed']) {
        $order->payment_complete();
        $order->add_order_note('Crypto payment confirmed. Transaction ID: ' .
            $transaction_data['txid']);
    }
}
Add this code to your theme's functions.php file or create a custom plugin to handle payment updates.
read also: fix wordpress white sreen error
Manual Integration with WooCommerce
You can also create a custom WooCommerce payment gateway. The following PHP code demonstrates how to define and register a new gateway class.
// Add custom payment gateway
add_filter('woocommerce_payment_gateways', 'add_crypto_gateway');

function add_crypto_gateway($gateways) {
    $gateways[] = 'WC_Crypto_Gateway';
    return $gateways;
}

class WC_Crypto_Gateway extends WC_Payment_Gateway {
    public function __construct() {
        $this->id = 'crypto_gateway';
        $this->title = 'Cryptocurrency';
        $this->description = 'Pay with cryptocurrency';

        // Add your implementation here
    }

    public function process_payment($order_id) {
        // Implement payment processing logic
    }
}
Place this code in the functions.php file of your theme or a custom plugin to enable a new payment method.
Custom Website Integration
Create a Payment Processing System
To build your custom payment processor, create a class like the one shown below. This class can handle payment address generation, payment verification, and webhook processing.
// Example of a basic payment processor
class CryptoPaymentProcessor {
  constructor(config) {
    this.network = config.network;
    this.apiKey = config.apiKey;
    this.webhookUrl = config.webhookUrl;
  }

  async createPaymentAddress() {
    // Generate unique payment address
    return {
      address: 'generated-crypto-address',
      amount: this.calculateAmount(),
      expiresIn: 3600 // 1 hour
    };
  }

  async verifyPayment(txHash) {
    // Verify payment on blockchain
    const confirmation = await this.checkBlockchain(txHash);
    return {
      confirmed: confirmation.status,
      amount: confirmation.amount,
      timestamp: confirmation.timestamp
    };
  }

  async handleWebhook(payload) {
    // Process webhook notifications
    if (this.validateWebhook(payload)) {
      await this.updatePaymentStatus(payload);
    }
  }
}
Include this class in your backend application. Replace placeholder methods like checkBlockchain and validateWebhook with actual implementations suitable for your blockchain network.
Security System Check
1. Input Validation
Validate all user inputs, especially payment addresses. The following example checks if an Ethereum address is valid:
function validateCryptoAddress(address) {
  // Example for Ethereum address validation
  const ethereumAddressRegex = /^0x[a-fA-F0-9]{40}$/;
  return ethereumAddressRegex.test(address);
}
2. Amount Verification
Ensure the payment amount matches your expectation. Use the following code to verify amounts within a tolerance:
function verifyPaymentAmount(received, expected, tolerance = 0.01) {
  const difference = Math.abs(received - expected);
  return difference <= tolerance;
}
Replace the received and expected values dynamically based on the transaction data.
Conclusion
Adding cryptocurrency payments to your website doesn’t have to be complicated. With the right approach and by following this guide, you can easily set up a secure and user-friendly crypto payment system. Just make sure to plan carefully and stay informed about any legal requirements, and you’ll be ready to welcome a new wave of tech-savvy customers.
Frequently Asked Questions
How do I accept crypto payments on my website?
Either through a payment gateway that handles the wallet, conversion and confirmations for you, or by integrating directly with a blockchain node or provider API. A gateway is far quicker to launch and handles compliance paperwork; direct integration gives you custody and lower per-transaction cost but puts key management and confirmation logic on you.
Which blockchain is cheapest for accepting payments?
Fees vary by network and by congestion rather than being fixed, so compare current costs before committing. The practical rule is that settling small payments on a high-fee chain destroys the margin — if your average order value is low, the network fee matters more than any other factor in the decision.
Do I need KYC or a licence to accept crypto payments?
It depends entirely on your jurisdiction, your volume and whether you convert to fiat. Rules differ sharply between countries and change often. Treat this as a question for a qualified professional in your own jurisdiction rather than something to settle from a blog post — including this one.
How are chargebacks handled with crypto payments?
They are not. On-chain transactions are final once confirmed, which removes chargeback fraud but also removes the buyer protection customers expect from cards. You need your own refund policy and process, because the network will not reverse anything for you.
What about price volatility between payment and settlement?
This is the main operational risk. Most gateways offer instant conversion to a stablecoin or to fiat at the moment of payment, which caps your exposure to the confirmation window. If you hold the crypto instead, you are taking a market position on every sale, whether or not you intended to.
Can I add crypto payments to WordPress?
Yes. Most major gateways publish a WooCommerce plugin, which is the least technical route — install, connect your account and enable the currencies you want. Custom sites integrate the same providers through their REST APIs and webhooks.


14 Comments
Great explanation and very informative. You can tell a lot of effort went into this.
This was very helpful and well written. I’ll definitely come back to this site again.
Very useful information, explained in a simple and clear way. I found exactly what I was looking for.
Excellent resource with valuable information. Thanks for sharing this so clearly.
Thanks for sharing such a clear and helpful article. It was a pleasure to read!
Well done! The structure and clarity of your writing make it a great read.
I love how you make complex topics easy to follow. Excellent work!
Clear, concise, and practical information. I appreciate how easy it is to follow.
Great post! I learned something new and really appreciate the way you explained the topic.
This was very helpful and well written. I’ll definitely come back to this site again.
Great explanation and very informative. You can tell a lot of effort went into this.
Excellent content as always — useful, engaging, and well presented.
Excellent resource with valuable information. Thanks for sharing this so clearly.
This article provided exactly what I was looking for. Thank you for the great insight!
Community guidelines
We want the comments to be useful for every reader. Every comment is reviewed before it is published. A comment will not be approved if it is:
Keep it genuine and on-topic and it will be approved quickly. Thank you for helping keep the discussion clean.